
Please follow through the steps listed in Google Analytics and understand the concept of connection handle and job defintion.
All the concepts are fundamental to all the social and web connectors and they work in similar fashion.
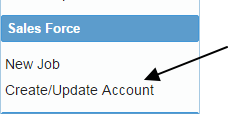
For Salesforce we will directly jump into creating the Connection Handle
1. Click on “Create/Update Account” under Sales Force
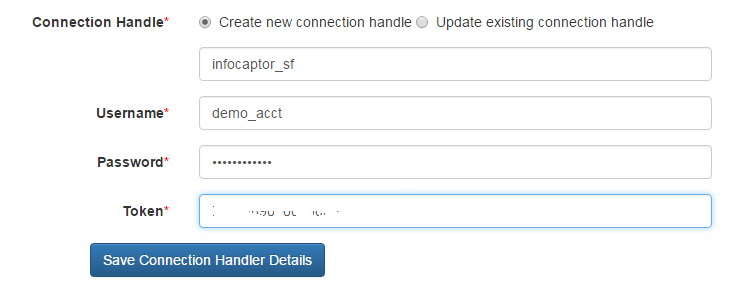
We enter the handle as “infocaptor_sf” (it can be any name)
Next, Enter Salesforce credentials and the developer token that you should apply for if you don’t have it already.
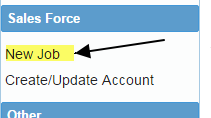
2. Click on “New Job” to define a new salesforce extraction job
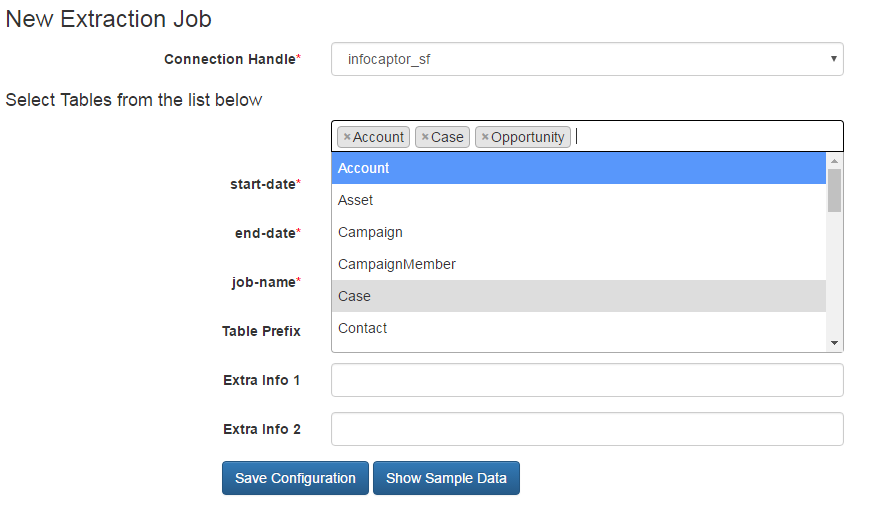
1. Select “infocaptor_sf” connection handle
2. In the list of Tables, the drop down allows you to select more than one Salesforce table. So select one table at a time
3. Provide the start and end date
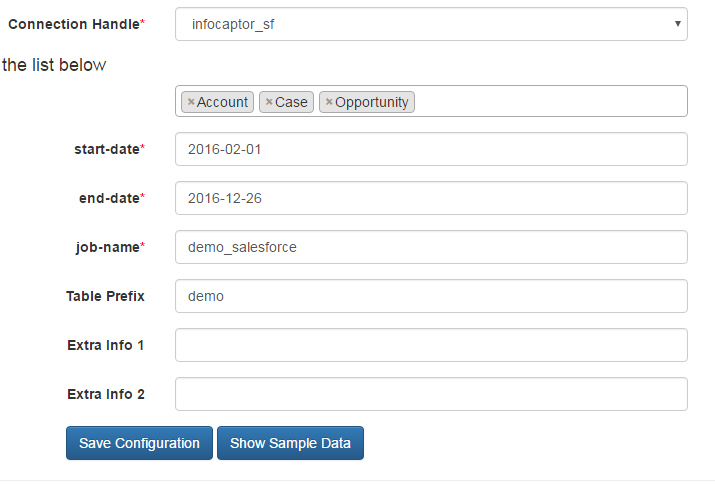
4. Enter job-name e.g demo_salesforce5. Table prefix e.g demo. In case of Salesforce, the job extraction allows to extract from multiple salesforce tables at once. So there is no “Target Table” like in Google Analytics.Instead we will provide a table prefix that will get attached to the three tables account, case and opportunity.
The final table names in the database will be like ic_sf_demo_account, ic_sf_demo_case, ic_sf_demo_opportunity. The prefix “ic_sf” is added during the loading process.
The prefix “demo” is supplied through this job definition form. All your Google Analytics and Salesforce (and other social website data that will be integrated in the future) will sit in one location that you can easily analyze.