Table of Contents
Documentation for WooCommerce Reports
Setup and Installation
- Download the plugin file
- Login to WordPress and go to the plugin section
- Click on Add new plugin
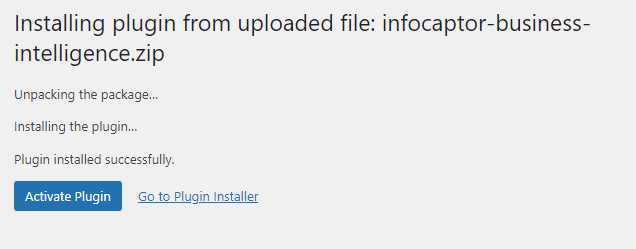
- Upload the plugin “infocaptor-business-intelligence.zip” file
- It will begin and upload the plugin
- Once the plugin is uploaded, activate it
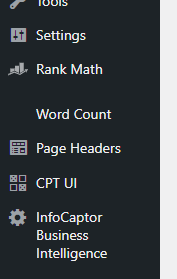
- Navigate to the “InfoCaptor Business Intelligence” page to complete rest of the install
- There will be a huge button on the top “Click to Complete Setup”
- This action will install the necessary database objects
Install InfoCaptor Viewer and Dashboard Editor
This plugin comes with a full Business Intelligence capability. It allows you to build reports and dashboards on any database tables of your choice that are accessible from the wordpress installation.
To enable the Viewer and the Editor please follow these steps
a. Click on the “InfoCaptor Business Intelligence” page
b. Click on the “Setup Options”
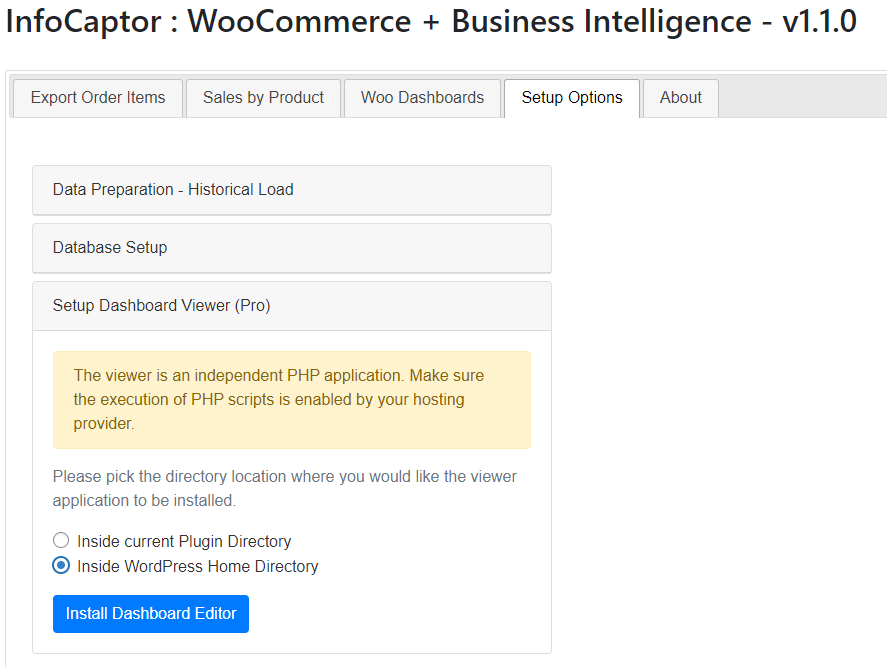
c. Pick “Inside current Plugin” or “Inside WordPress Home” Directory.
d. If you plan on using the Dashboard builder to build reports for other data stored in your mysql database then it is suggested to install inside the “WordPress Home” Directory
e. Click on “Install Dashboard Editor”
f. Once installed, you can navigate to the “Woo Dashboards” page and refresh the URL
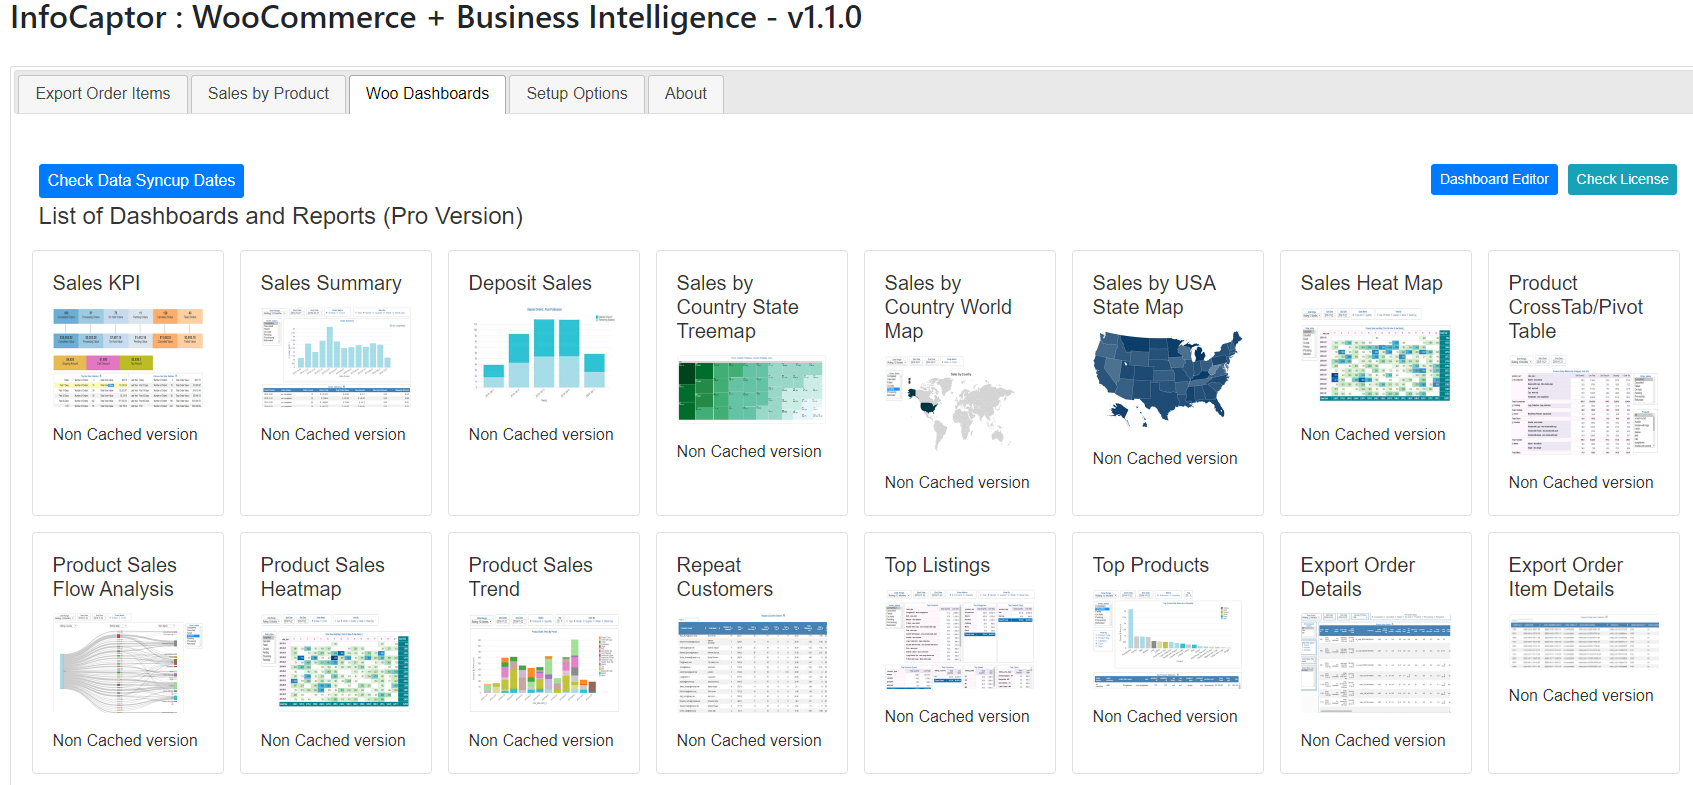
g. These are the pre-built reports for WooCommerce
Process Initial Data and setup Incremental Data load
The WooCommerce Reporting Pro plugin processes your woocommerce orders and products related data and creates easy to use structures that are extremely fast and efficient for reporting purpose. The default woocommerce and wordpress tables are not suitable for live reporting.
In order to facilitate this, the plugin requires to process all tables and related meta fields. This is called the initial data process or initial data load. Once the initial data load is complete it runs every day to gather daily incremental data and appends to the existing new structures.
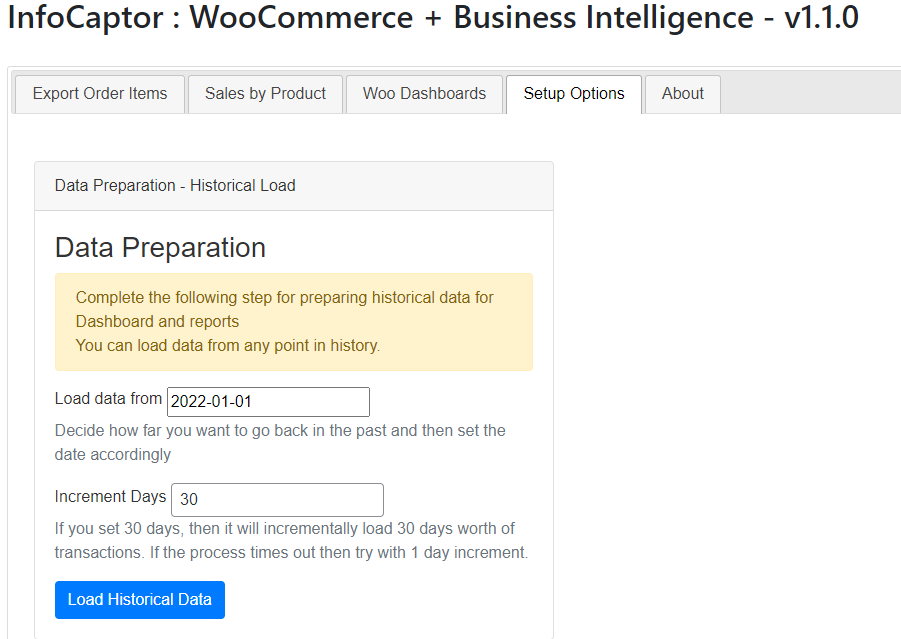
We will use the “Load Data from” and “Incremental Days” to perform a one-time historical data processing.
Load Data from is usually the date when you actually started your online store or when you started receiving orders. Sometimes you may not wish to start from all the way but say just 3 years ago. Choose this date accordingly.
Incremental Days is the number of days in batch processing. The default value is 30 days. If your store is processing several thousand orders per month then the server might encounter a timeout before the batch is finished processing. Start the incremental data load with the default values. If you encounter issues then adjust the incremental days and restart the data load.
For e.g. If your Load Start date is 2017-01-01 and Incremental Days is 15 then the first batch of orders will be processed from 2017-01-01 through 2017-01-15 i.e 15 days worth of history will be processed
Next, it will increment the batch and process from 2017-01-16 through 2017-01-31.
If your store is processing a high volume of orders and the load seems to error out then try reducing the Incremental days to a lower value.
For e.g If your batch errors out at 30 days then lower the value to 15 and restart the process. If it errors again then lower the value to say 5 and restart.
Troubleshooting
There is a number of things that could go wrong during the install and at every step, the plugin offers suggestions on what went wrong.
- PHP Timeout : If your PHP session timeout is very tight and server is not very responsive then this is a common error. The solution is to increase the timeout value and restart the installation
- Create View Privilege: The plugin creates a bunch of views for easier reporting. Please check with your hosting provider to ease this restriction
- Create Routine Privilege: If your installation stalls and errors at the creation of the stored procedure please have this restriction removed and proceed with the data collection.
- File write error: Check your web or php error logs. If you see there was a file write error then probably your PHP or apache user does not have proper rights to create new files.
Please email us (contact@infocaptor.com) all the log files that are found in the infocaptor/logs directory. We will look into the logs and provide a skype session to fix the issue for you.
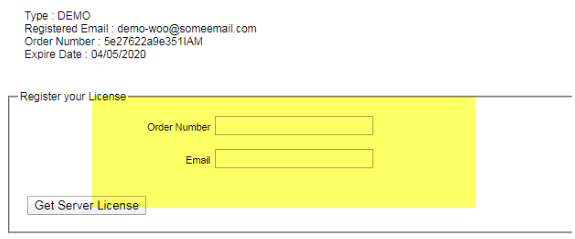
How to apply license information
Once you make a purchase of our license, you will receive an email with the license code and instructions
Sample license information
License Information
Order=’507d62abcdef’
Email=’contact@yourcompany.com’
Go to the Woo Dashboards Tab and click on “Check License”

In the Info Tab, you will see a demo license information. And below that you will see a place where you can input your license information that you received via email. Copy/paste the order number and the email and then click on the “Get Server License”. This should register your license.