
With the CSV Uploads your CSV data is directly loaded into MySQL database. Let say you need to upload Profit and Loss data for your company into the Social Warehouse. This would not be just one time load, you will most likely do the uploads every month, quarter or annually.
CSV Uploads uses the ETL approach so that you define your CSV to Table mapping once and then you can simply keep uploading against the same configuration as long as the format of your CSV data remains the same.
How to upload CSV to MySQL Datawarehouse
1. Login to Infocaptor
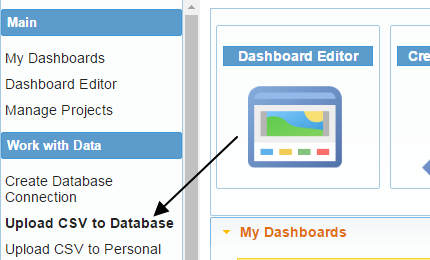
2. Click on the ‘Upload CSV to Database’ link
3. It opens the following screen where you can provide the CSV file and either define a New configuration or process it with existing configuration.
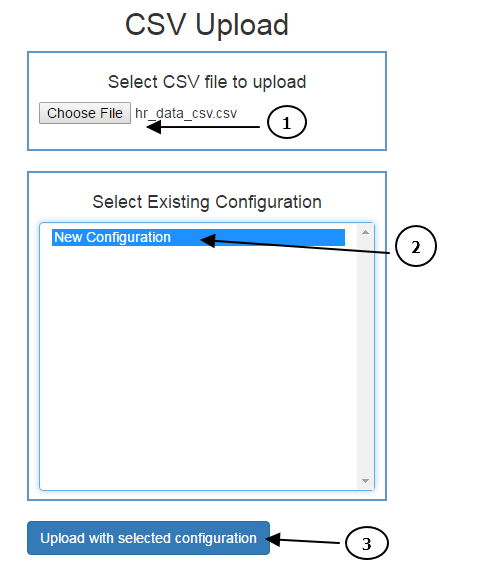
First click on ‘Choose File’ and then browse your PC to provide the appropriate CSV file. If you want to process an Excel file, just save it as CSV and then proceed further.
Since we are using the upload for the first time, we select ‘New Configuration’ and click on the ‘Upload with selected configuration’ button.
4. It uploads the file to the server and displays the following configuration screen
The configuration screen is split into three sections
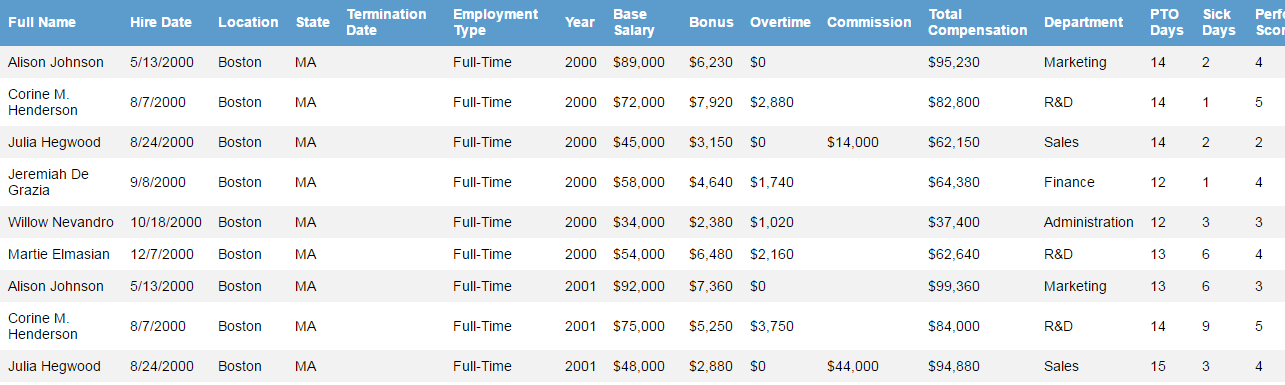
First section shows a sample rows from the CSV file
The second section shows the column mappings
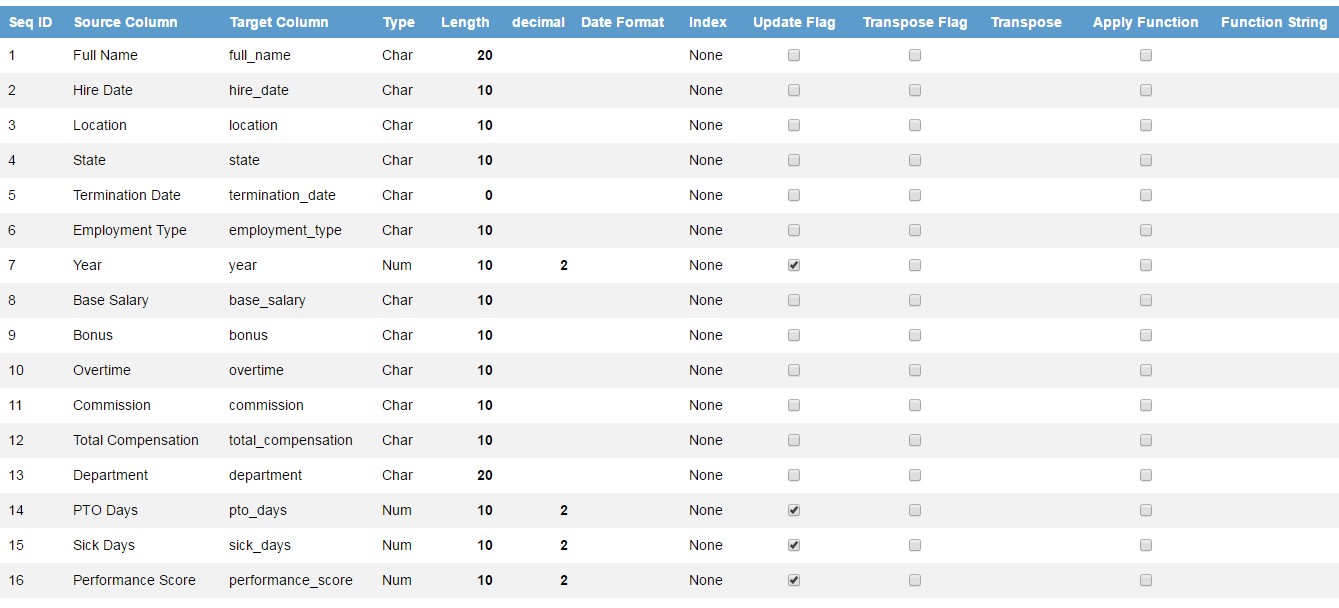
In the second section the second column is ‘Source Column’ that is captured from the uploaded file. The third column is the Target column. By default the target column is same as the source column but if you wish to change then click on the cell and you can edit the name of the target table column.
The first row in the CSV file is the column names and the second row in the uploaded file is used to determine the column types. You can adjust the column type and the length. You can learn about the different configuration options in the advanced section below.
In the last section you can define the target table name
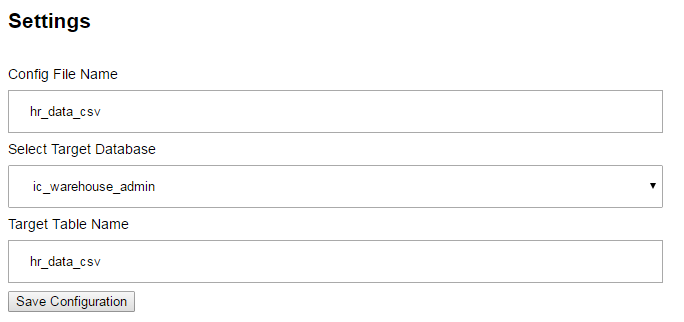
Define the Config File Name
Select Target Database, in this case it should be a MySQL based Connection. In future it will be possible to upload to other databases such as Oracle, SQL server etc.
And lastly provide the Target Table Name
Click on the “Save Configuration”
Once you save the configuration, it kicks off a background process and loads the CSV to the Target Database and Table name.

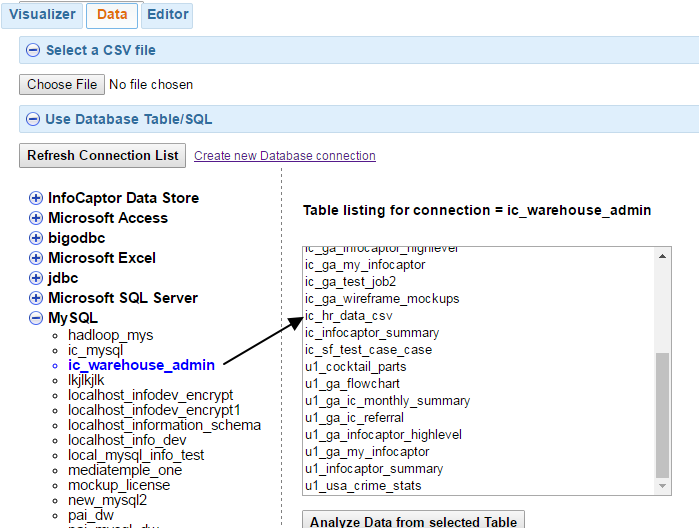
How do you verify the uploaded CSV file
1. Go to Dashboard Editor
2. Click on the Data Tab
3. In the bottom go to the MySQL connection
4. click on the ‘ic_warehouse_admin’ connection
5. The table shows with a ‘ic_’ prefix
Next time you have an updated file, you can go back and upload against the existing configuration file.