
NOTE: InfoCaptor Enterprise requires a webserver to run no matter where you install. For windows, the zip file (infocaptor_enterprise.zip) comes packaged with a small webserver (server2go) so that you can simply double click and run it on your PC or laptop. But for other OS like linux and Mac, you will need to make sure you either have a webserver or install it separately.
For Windows Server : You can use this method to install on any windows machine. This is ready to go complete server.
If you don’t have a webserver on your machine and you wish to run it locally (e.g Mac OS or Linux laptop) then
Download
Check other XAMPP flavors
Assuming you have either installed a new webserver (as above) or already want to use existing webserver please follow the remaining setup instructions as below
- Download infocaptor_server.zip (you should have received a download link along with license information when you placed your order)
- Unzip and FTP
- Unzip the zip file and then FTP the entire infocaptor_server directory OR
- You could FTP the zip file and then unzip on the server (this is preferred)
- Rename the infocaptor_server directory if you wish
- You can also rename the “dash” directory to anything you wish
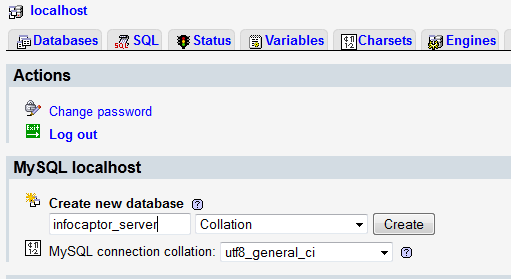
- Open PHPMyAdmin and create a database to host all the infocaptor objects and note down the host, port, database name, user and password information
- Launch the mt_install.php file from the webserver where you uploaded all the files
- For e.g If your site domain is “mysite.com” and you uploaded the infocaptor_server to the root then your path to mt_install.php would be
- http://www.mysite.com/infocaptor_server/dash/mt_install.php
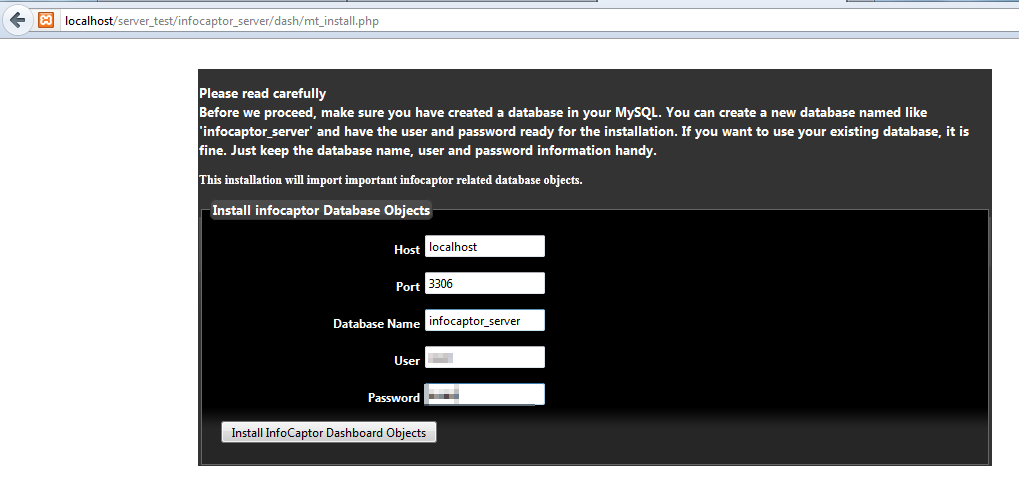
Enter the credentials for the database we created in the previous step and click “Install InfoCaptor Dashboard Objects”
- NOTE: If you hit any error during the database install script then please follow these extra steps
- Goto the infocaptor_server/dash/dbconfig directory and rename the file xmember_dbconfig_sample.php file to xmember_dbconfig.php
- Edit this file in Notepad++ or any other editor and update the values from the above screen (step 12)
- Now go back and execute the mt_install.php script
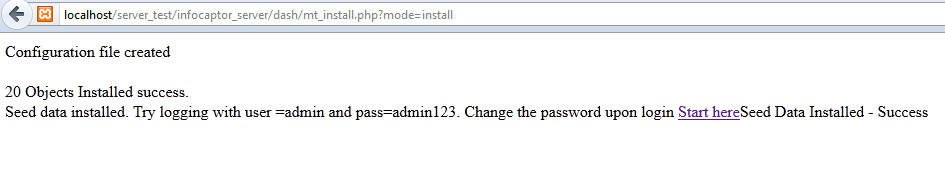
- Once all objects are installed, click on “Start here” link and it will login you to InfoCaptor Enterprise
- This completes the basic installation. If you want to work with Oracle or SQLserver or other JDBC supported databases then please follow the steps below
Installing and configuring Tomcat
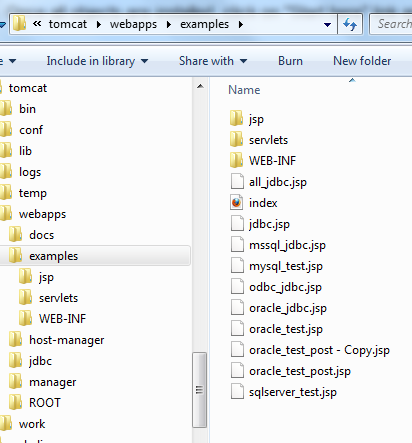
- If you are running XAMPP then you can copy the JSP files to tomcat/webapp/examples directory
- The Source JSP files are under the infocaptor_server/dash/system/tomcat_files/jsp directory
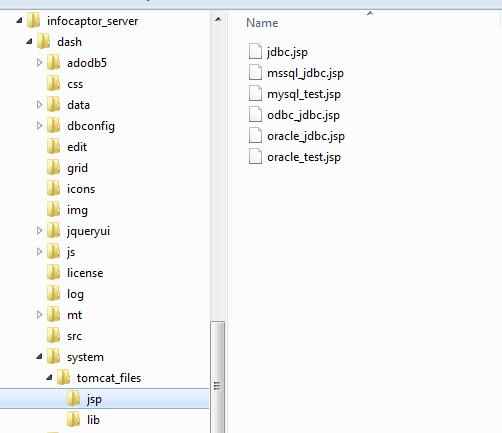
Copy all of the jsp files to the tomcat’s webapp/examples directory
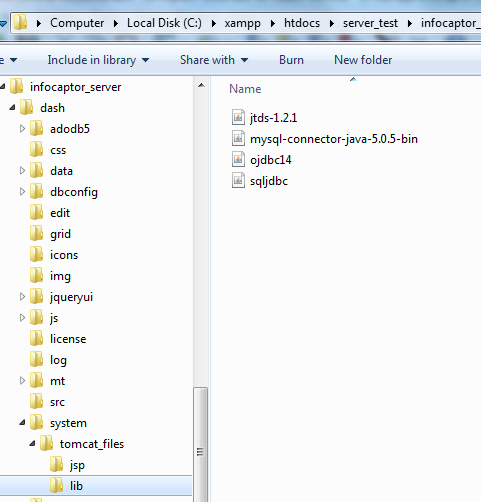
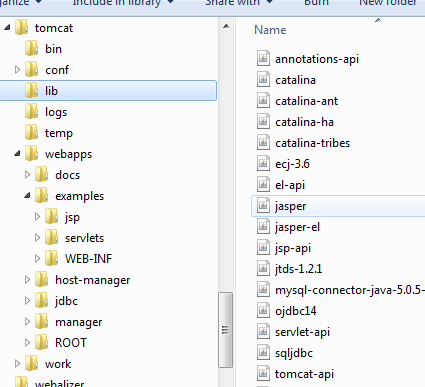
Next, copy the all the drivers in the tomcat_files/lib directory to your webserver’s tomcat/lib directory
- Start tomcat by running catalina_start.bat or catalina_start.sh
- The default port for Tomcat is 8080 and if your tomcat runs on a different port then please modify the system/jdbc.php file and update the tomcat URL (this also is true if you change the location of the jsp files)
This completes the server setup. If you just want to connect to MySQL then you don’t need Tomcat to be configured