
Combobox control is useful for selecting single value or multiple values from a given list of values. This is often utilized in place of select/combo box when there are lot of values to select from
NOTE: Defining combobox control is very similar to radio box control and checkbox control
Select/Combobox can function as radio control so that you can pick only one value at a time or a checkbox so that you can pick multiple values.
Combobox can function as single selection list or multiselect list
A) How to add it
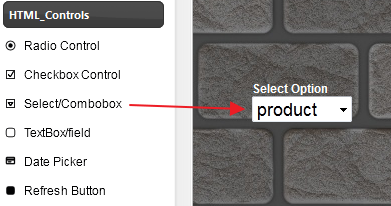
1. Expand HTML_Controls section in the left panel
2. Drag the “combobox Control” and drop it in the center canvas
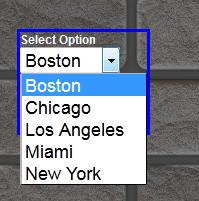
B) How to add static values
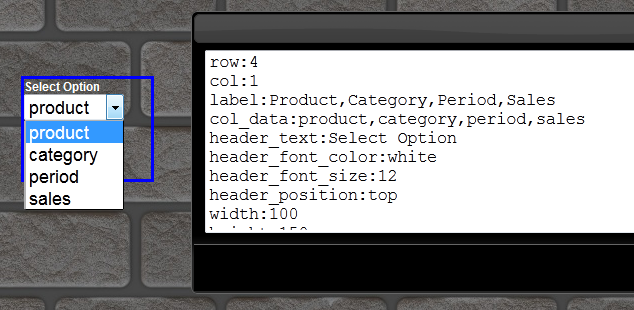
1. Select the control (it should be surrounded by blue border)
2. Double click to invoke the editor
3. Provide comma separated values in the label and col_data fields
4. Click OK. This will give a new set of values to the combobox control
C) How to add dynamic values
You can source dynamic values from any data source including SQL database or webservices. This control has access to all the data sources you define and that are available by default.
Sourcing dynamic values to a html control is same as populating a data-grid or any chart through other data connections In the following example the combobox control is populated from Excel file
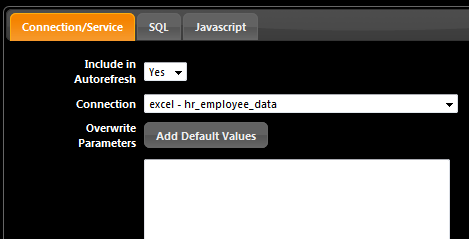
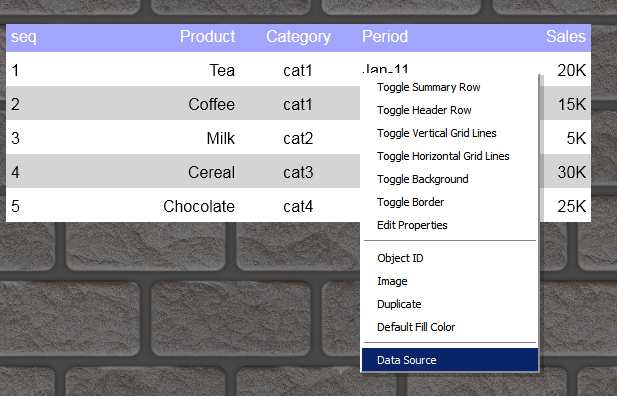
1. Right click on the widget
2. Select ‘Data source’
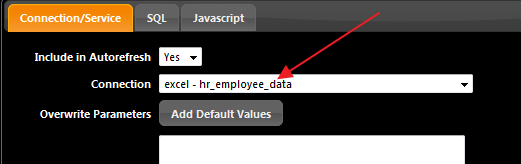
3. Select the appropriate data connection
4. In the SQL tab, provide the sourcing SQL query
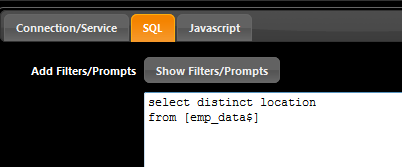
5. Click OK As you see, the control is now replaced with new set of values directly derived from the excel file. Similarly you can source these valuesfrom a text file, Microsoft Access, Oracle, MySQL, SQL Service or a third parth web service. Since we sourced it from the Excel file, the excel file seems to contain some blank rows and that is why we are seeing a blank entry in the top of the list. This can be eliminated by simply providing a not null condition on the column
select distinct location
from [emp_data$]
where location is not null

Click OK and here is the resulting data
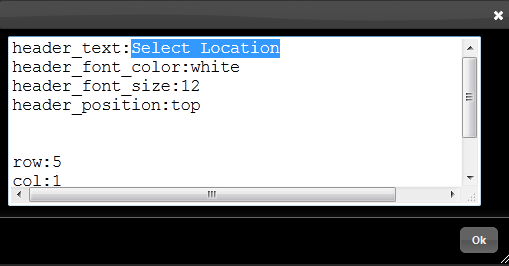
D) How to change the title
1. Double click the widget
2. Change the text for header_text
E) How to change the id/name
Every html control passes information to the entire dashboard using a specific channel. And all the data widgets would selectively listen to these channels for any change in values.
When the user selects a different value in the control, this new value is broadcasted to this channel and every widget that is subscribed to this channel is notified of the change.
The widget will then update its data based on the new channel value. The name of the channel is defined using the widgets name property.
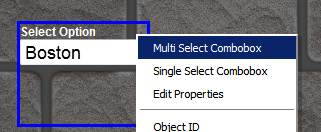
1. Right click on the Widget
2. Select ‘Edit Properties’
3. Scroll up to the top and find “name”
4. Change the value for the name property and give a descriptive name
Edit properties
Change the name
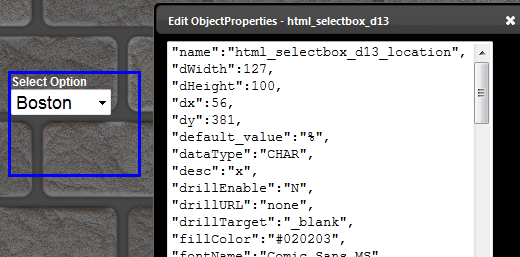
In the name, we just appended with a description “location” to indicate that this control is for location combobox button. You can change the entire name but in this case we just chose to append it and keep the other information as it is.
F) How to set default value
You can set a default value for each control.
1. Right click on the widget
2. Select “Edit Properties”
3. Go to the top and there is a property “default_value”
4. Set a value
G) How to use it inside data widgets
Now that we have defined the control, we can use this inside any data widget The current value of this control is broadcasted into the channel name “html_selectbox_d13_location” and you can reference the contents of this channel inside any widget’s SQL query by simply saying “param<channel_name>”
So in this case we can use “param<html_selectbox_d13_location>”
(NOTE: it needs to be exactly param<channel_name>, there cannot be any special characters)
Example 1.
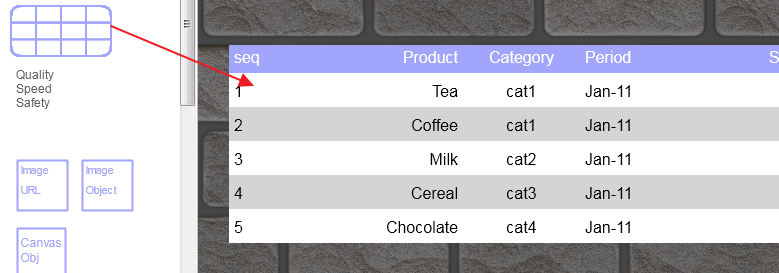
Use it in a Grid
1. Drag a Grid
2. Right on Grid and select “Data Source”
3. Enter the following query
select location,count(location) as employee_total
from [emp_data$]
where location is not null
group by location
select the excel connection handle
and then enter the above SQL

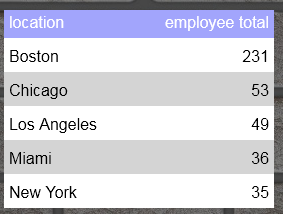
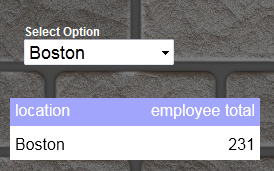
Click ok and the grid populates with new values
Now we will link this grid to the above combobox control (in short listen to changes on combobox selection)
Right click on the grid, select “Data Source” and modify the SQL to add one more condition for location such as
select location,count(location) as employee_total
from [emp_data$]
where location is not null
and location =group by location
Notice how we are using an “in” condition instead of “=”.
This is because the combobox allows the user to select multiple values and the in condition is better suited for this purpose.
Now click on the “Show Filters/Prompts” button Expand “Input_controls”
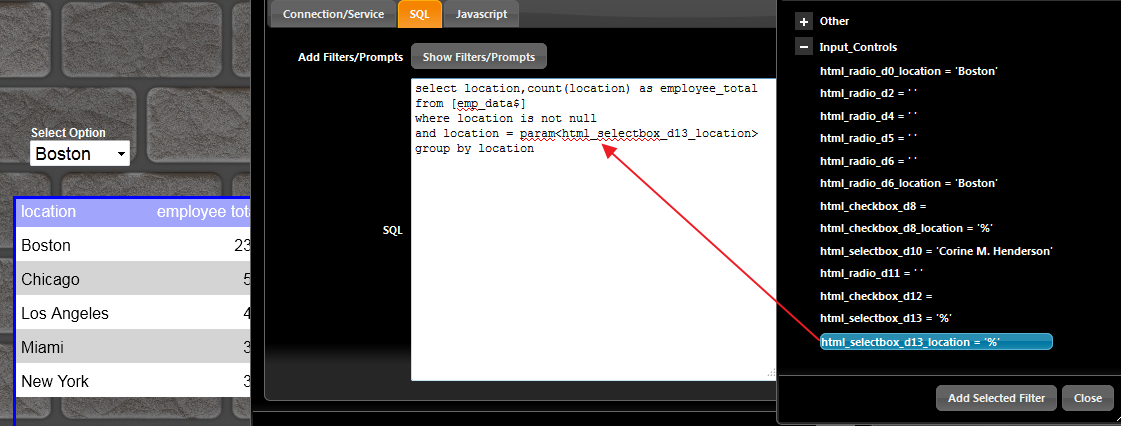
Select the entry “html_selectbox_d13_location” and click on “Add Selected Filter”
This action will add the string “param<html_selectbox_d13_location>” wherever your cursor is inside the SQL area. In our case we left our cursor ( after location = )
Click “close” for the ‘Dashboard Filter/Prompt’ dialog.
Click OK for the SQL Window.
The grid now shows as below
And the moment you change the selection the grid automatically updates (In the designer mode, the selectbox does change value with the mouse selection, it works with arrow keys and press enter key)
This ends the basic introduction to combobox selection control for Dashboards
Multi Select List You can change the single select list to multi select by right click on the component
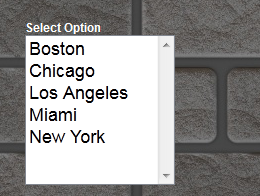
It becomes like this
Now since we can select multiple values, we need to change the Grid query (similar to Checkbox)

How to provide a selection that represents “ALL” In SQL, when you provide a condition such as where column like ‘%’ then this is a wild character match and returns true and hence all rows
So if our parameter can pass a value of ‘%’ then we can use it in our queries. In short we are trying to acheive the following
So in our SQL query, we can provide two columns, the first field acts as internal value and the second column acts as display value.
When we provide only one column (as demonstrated in the top sections), then the same column acts as internal and display value.
Here is the modified Excel SQL query for the location combobox control We need to use a union query, the top part will give us a static value and the bottom part the actual location values from the Excel Worksheet.
select ‘%’ as id, ‘All’ as location_dispfrom [emp_data$A1:A2]
union
select distinct location as id, location as location_disp
from [emp_data$]
where location is not null
You can reference Excel worksheets in its entirety or individual cell ranges
So when you say [emp_data$A1:A2], it is trying to treat that cell range A1:A2 as a new dynamic table that you can query on. Now since A1:A2 represents only one cell jumpso it is perfect for us to use this for our union query. If we used a bigger range A1:A3 it would still work because the union clause will merge all duplicates.
But if we were to run it on a Grid and without the union you will see duplicated values. In the second portion of the union SQL, we are using the location column twice, once as id and second as display value
Once we have the combobox control, we can change the SQL in the Grid widget to as below
select location,count(location) as employee_total
from [emp_data$
]where location is not null
and location in (param<html_selectbox_d13_location> )
or location like param<html_selectbox_d13_location>
group by location
So by simply adding an “OR condition and location like ” we are able to make the grid work on ‘ALL’ selection or individual location selection. When the user selects ‘All’, the value of ‘%’ is passed to the param<html_selectbox_d13_location> so the second portion of the ‘OR’ condition becomes trueand when the user selects say ‘Boston’ then the first part of the condition becomes true. NOTE: In the newer release, a new property is introduced that makes adding ‘All’ value simpler. Double click the control and you will find the property
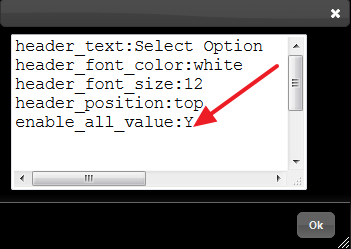
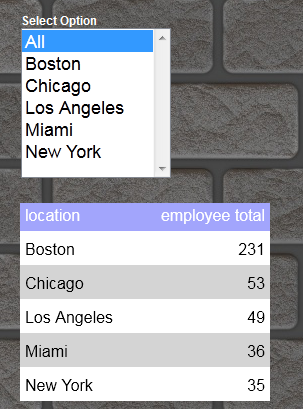
By setting the value to “Y” we get a new “All” value at the top of the list.
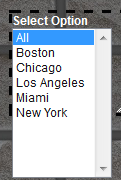
When the user selects this “All”, then all the values in the list is sent as a comma separated value Value Prefix and Postfix In the properties, at the very bottom there are two important fields
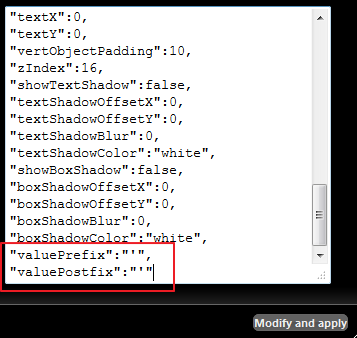
These are valuePrefix and valuePostfix By default they are set to a single quotation [ ‘ ] value. In case if you want to pass numeric values or some other value like double quotes etc then you can set the value to empy like”valuePrefix”:”” to pass no quotes around the value. Same for valuePostfix