
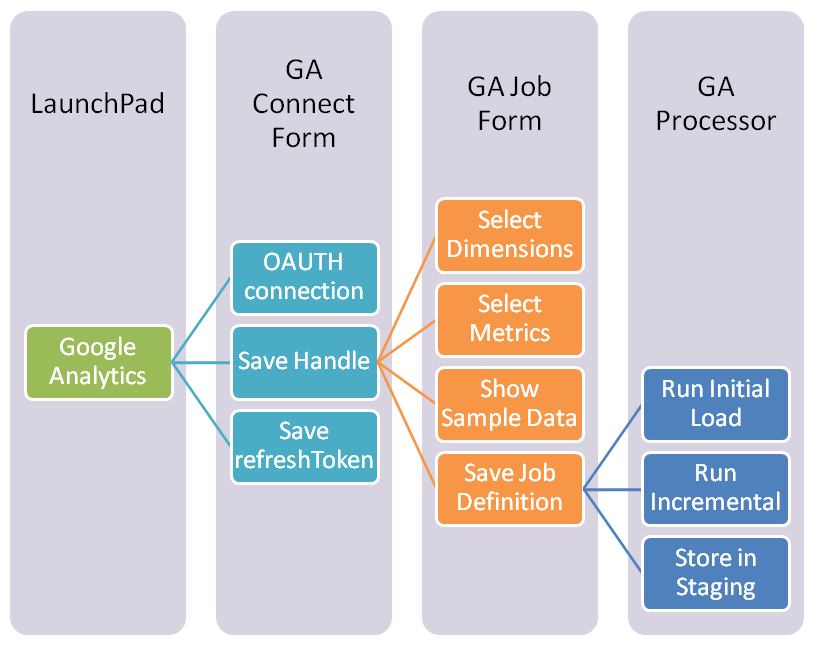
Google Analytics Infocaptor (GA) connector is a very easy way to start analyzing your data from Google Analytics.
- With this connector (GA), you can securely connect to one or multiple accounts/profiles within Google Analytics.
- You can define multiple extraction jobs
- You can merge multple website data into single MySQL table
- Once you define what metrics you need, the connector handles the rest and keeps on adding incremental data by appending to the existing tables.
NOTE: Very important for self hosted InfoCaptor: please complete the Google Analytics API setup. You don’t need to perform this step for my.infocaptor cloud access.
High Level Steps
1. Login to InfoCaptor
2. Define Google Analytics Connection
3. Define Extraction job
4. Run Extraction job
5. Done.
Detail Steps
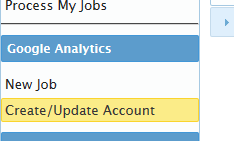
1. Login to InfoCaptor
1.1Click on “Create/Update Account” under Google Analytics
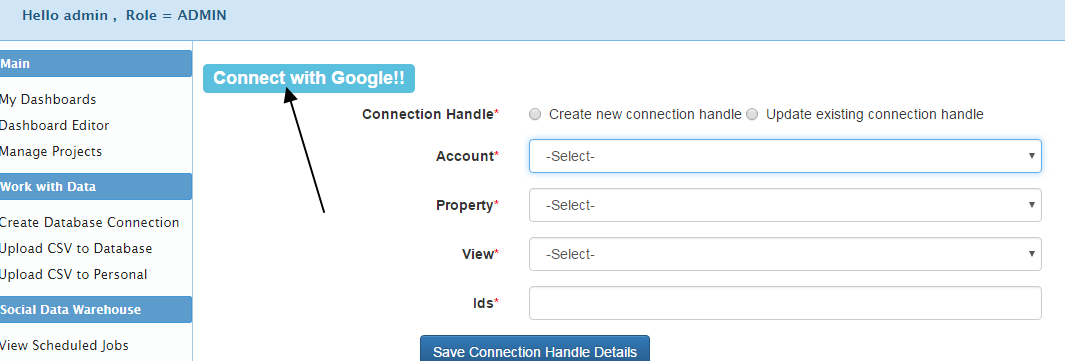
2 Click on “Connect with Google”
Once you select the Google Account it will prompt you for your permission
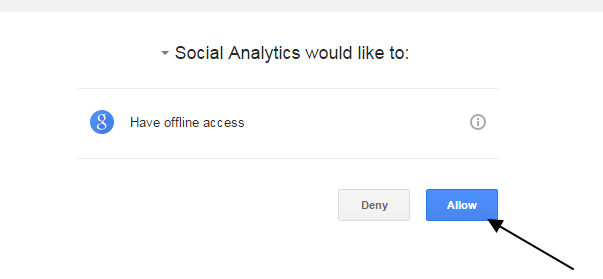
Click ‘Allow’ to continue Once authenticated, it populates your Google Analytic account and property details.
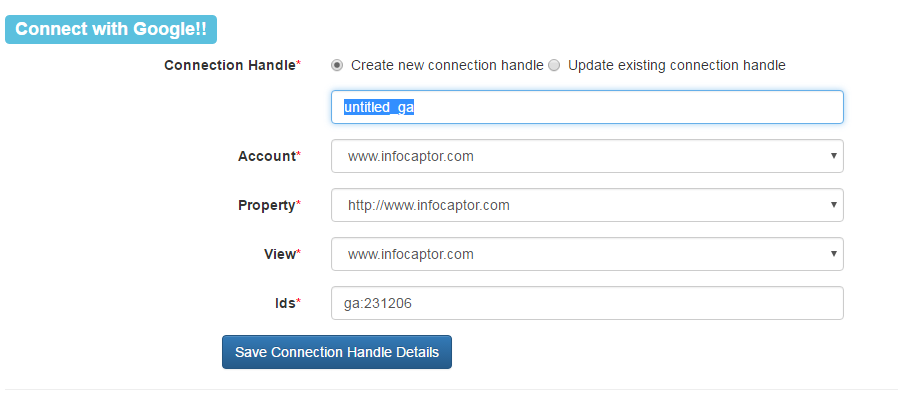
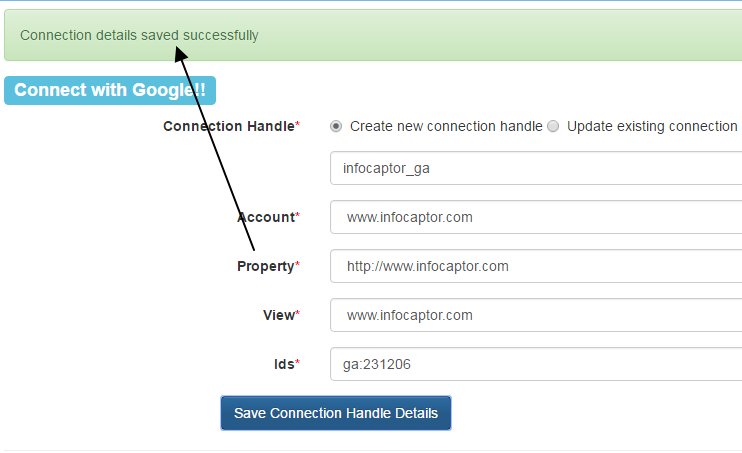
For the connection handle, select ‘Create new connection handle’and then rename the handle from “untitled_ga” to a meaningful name In our case we name it “infocaptor_ga”
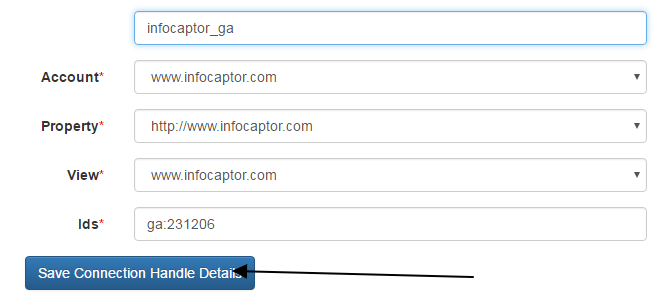
And then click on “Save Connection Handle Details” You should see a successful confirmation
3. Define the Job for extraction data Click on the “New Job” link under Google Analytics
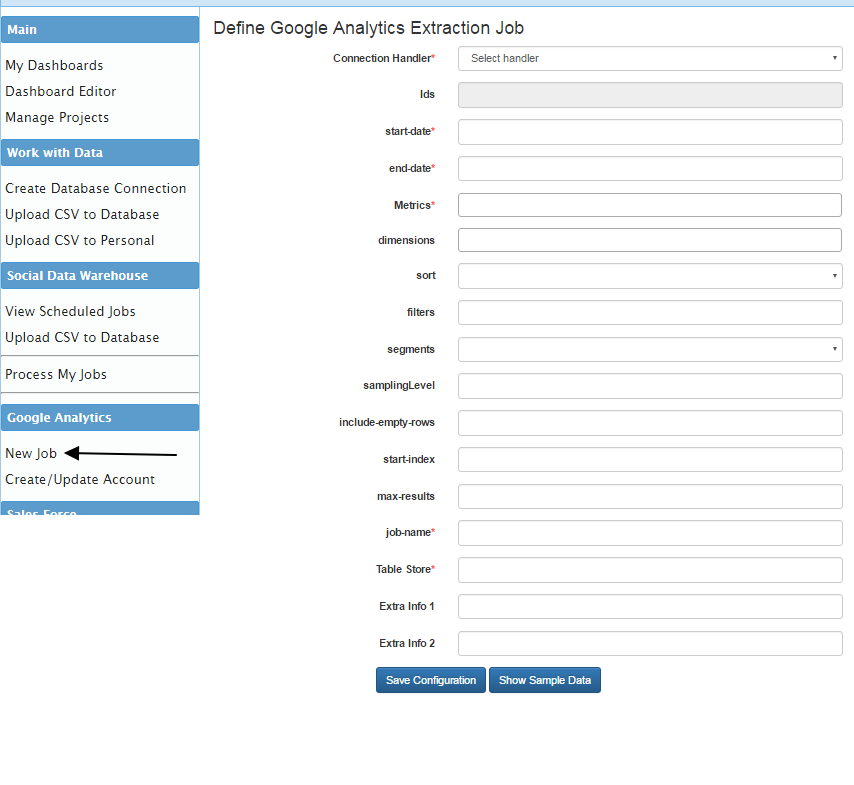
On the right panel you will see a Job definition form. The form has many options and is designed based on an actual form by Google Analytics team.To keep it simple we will provide only the required fields that are marked in red star.
The first step is to pick the Connection handle that we defined in step 2
You could have multiple Google Analytics connection handles. For e.g if you are marketing agency that handles google analytics account for your clients then you can have one connection handle for each of your client.
Connection Handler

In the above screenshot we added one more handle to illustrate multiple handles.
Once you pick the handle it populates the ID field

Start Date and End Date
Pick the start and end date using the date picker
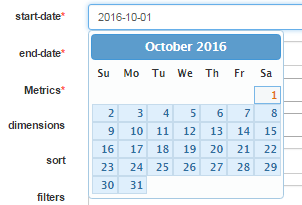
The start and end date define the date range for your data extraction process. This is needed for the initial Job run.
Every data extraction job has two phases. The first phase is the initial job run and the second phase is the incremental job run.
By giving the start and end date the initial job run has these date boundaries to work with. It submits these dates to the API and extracts the data. Once the initial load is successfully completed it switches the job run into “incremental” mode. In the incremental mode, the job automatically picks the last run date as the start date and current date as the end date. This way it ensures it does not miss a single day of data collection and keeps appending rows of data to the existing tables.
Metrics
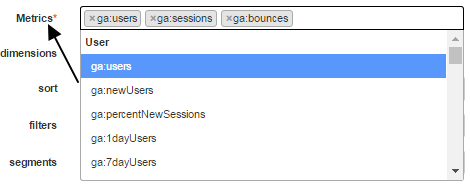
Click on the drop down, select the desired metrics and repeat the process to add to the list of metrics
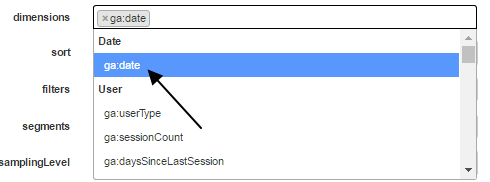
Dimensions
Dimension is optional but it is always a good practice to include at least one dimension such as the date field. The date dimension is available at the very top for easy pickup.
If you are not familiar with the remaining fields then you may keep them untouched.
Job Name
We need to give a name to this job. Since you will end up with many data extraction jobs this name will help you identify the job with the data pull.
Table Store
This is the table name (MySQL Data warehouse) that will contain your extracted data.

In the above example we named the job and table store same for easy tracking but you can have them named differently as they are independent of each other.
Show Sample Data
This is a very convenient way to test how your extracted data will look like. Clicking this button will bring a very small sample of data for your review purpose
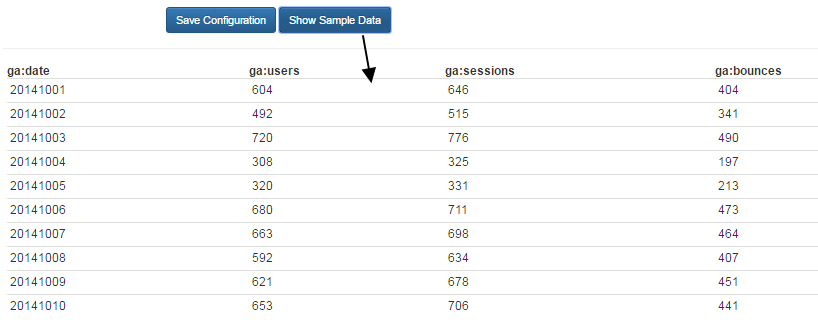
Save Configuration
Click on “Save Configuration” button and within few seconds it should show a successful confirmation
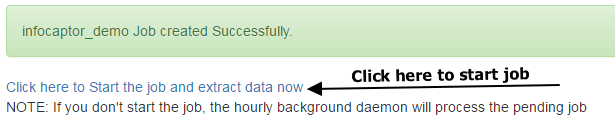
If you have scheduled the background worker then the job will be picked up in the next run of the daemon. Even though you may have the daemon already scheduled you can still go ahead and kick off the job manually.
Once you click on the link above where it says “Click here to Start the job and extract data now” you will the extraction process begin
Caution: The process will take some time to finish so do not close the browser or hit the refresh button.
Once done, you will see the following messages in the browser. This indicates that the job completed successfully.
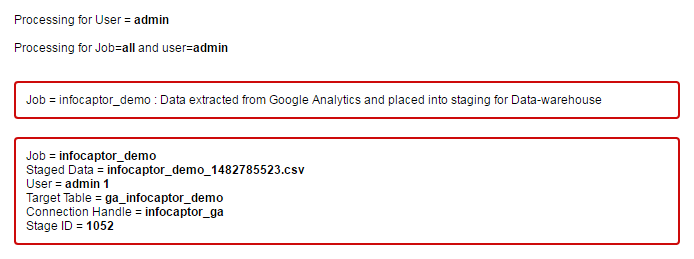
The target table is “ga_infocaptor_demo”. The system automatically prefixes the table name with a two letter code “ic” so the final table name is “ic_ga_infocaptor_demo”.
All tables generated by InfoCaptor Social Analytics or the upload mechanism will have “ic_” prefix as part of the standards.