
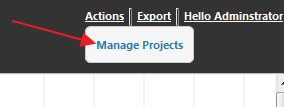
You can reach the dashboard from the editor via Manage Projects Button or the action menu Actions > Manage Projects
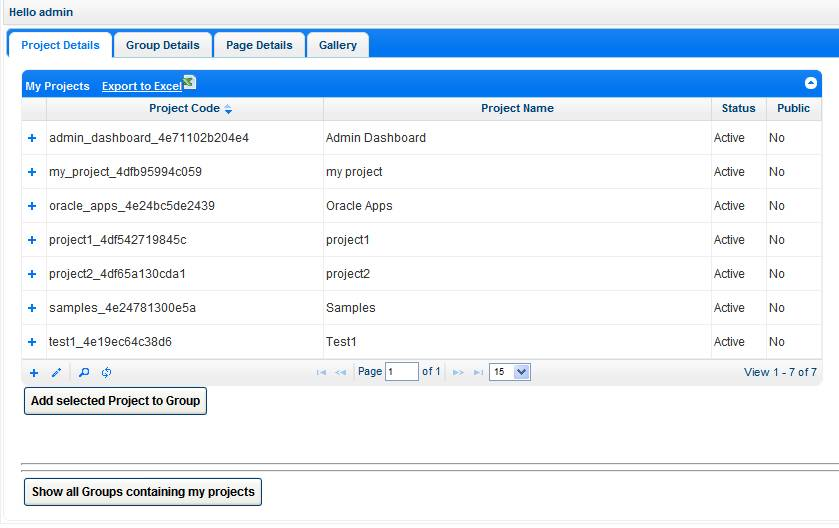
This is what you see when you launch the dashboard page
Quick Tip: The dashboard enables you to share your work with other users. Whatever you create belongs to you and you always have total control on your objects even though you shared with others. You can always revoke sharing anytime.
It has four sections.
Project Details
Group Details
Page Details
Gallery
Let us discuss each section.
Sharing Objects: Before proceeding let us understand how sharing works. As an owner of objects you always have full control on what you create. Objects can be shared with either “DEVELOPER” or “VIEWER” mode.
Group Details A group is a very simple concept. A group consists of projects and users. Each user in the system can create their own groups. If you are familiar with “Circles” feature of “Google+” then the groups behave almost the same. A group is a logical unit containing projects and members where members can share their projects with the whole group. What does a group represent? If you are a Social Media/Marketing agency, then a group can represent each of your clients
And then you can add only selected employees and client users to this group. This way all projects and dashboards is tightly knit within this group.If you are a big company then a group can represent a small department
A group can represent different teams inside your company and so on.
How to create Group
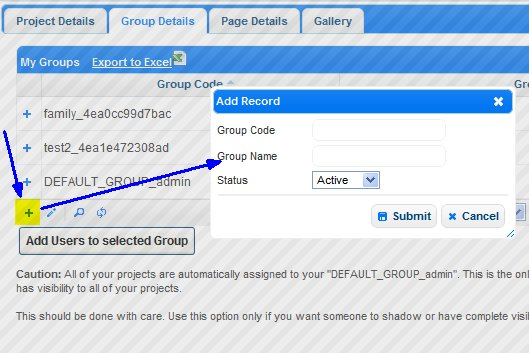
Click on the “+” icon to open the “Add record” dialog. Just Enter the ‘Group Name’
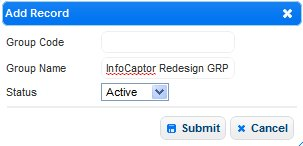
Click Submit and it adds a new entry in the “My Groups” list
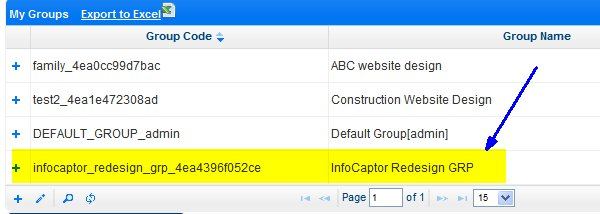
Once you create group you can add members to your group
How to add members to your Group
1. First click on the Group Name to select it
2. Click on “Add users to selected Group”
Users can be added using their email address either comma separated or each on a separate line
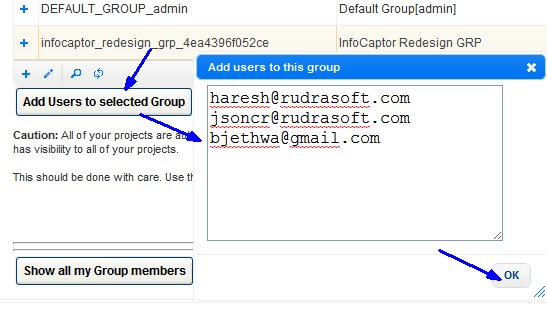
If you know the user’s account name then you can use that instead of email.
Enter each user’s email and click on “OK”
Once you hit “OK” it comes with a message indicating the results
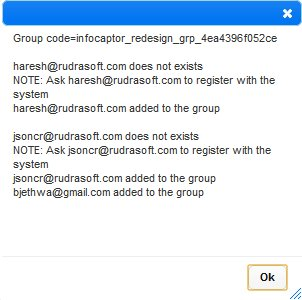
In this case the user haresh@rudrasoft.com and jsonc @ rudrasoft . com are not registered in the application so it reminds you to send them a note to register.
Once they register they will be automatically included in your group.
Yes, they need to use the same email address when they register. For the case of bjethwa @ gmail .com, the user was already registered so it found the user and added to the group.
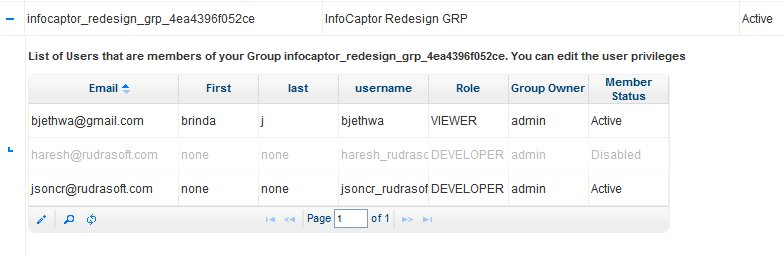
How to confirm the users in your group Now click on the plus sign “+” near the Group code
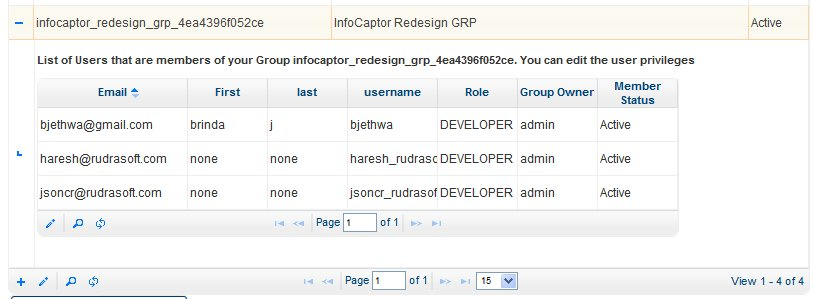
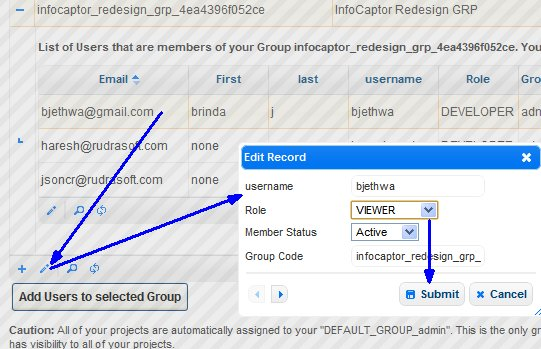
All of the users are by default added with “DEVELOPER” role. After you add, you can change the role or activate/deactivate their membership to the group.
Let us try to deactivate “haresh” and change “bjethwa” to just a “VIEWER” role
Here is the result after disabling “haresh”
Caution: All of your projects are automatically assigned to your “DEFAULT_GROUP_admin”.
This is the only group where you do not have to manually share your projects. So if you add any user as a member of your “DEFAULT_GROUP” then THAT user has visibility to all of your projects. This should be done with care. Use this option only if you want someone to shadow or have complete visibility in your team without the hassle of manually sharing individual projects.
For e.g If you are the project manager and you want your CEO to just have an “Eagle Eye” on all the ongoing activity then add your CEO’s email address to your “DEFAULT_GROUP”.
Now let us see how we can share projects to the above groups
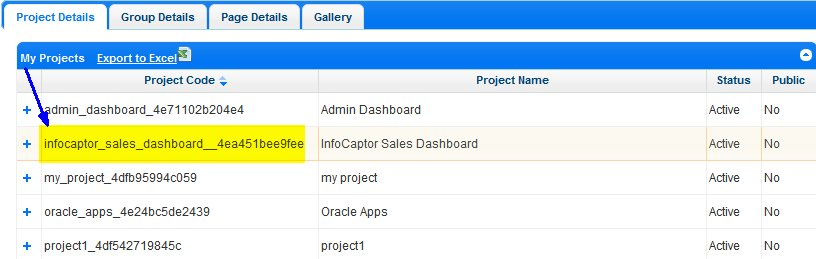
Project Details All the projects that you create through the Editor shows up in this list. You can share your projects to Groups.
When you share your projects you specify what role the members of the group can access this project with.
For e.g if you create “ABC Project” and share it with the “ABC Website client Group” with a “VIEWER” role then every member of the group “ABC Website client Group” can only view the pages inside the “ABC Project”.
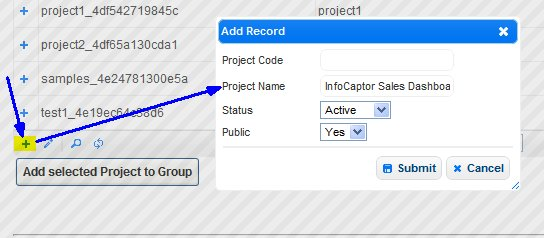
Let us create a new Project
Click on the “+” plus icon and a window pops up.
Enter just the “Project Name”
The project is added to your “My Projects” list
Now let us share this new project to the group we created earlier
Click on the “Add selected Project to Group”
NOTE: The record can be selected by clicking on the row.
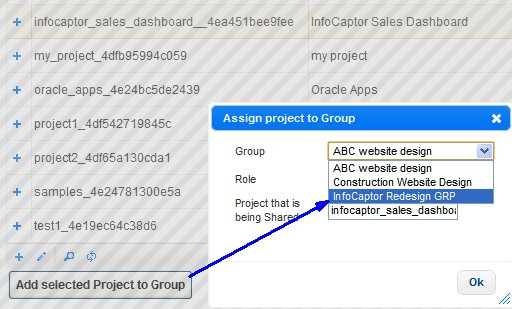
You will see all the groups that you own (you created) and also all the groups that you are member of (others have added you as member to their group).
Expand the Project node by clicking on the “+” sign and you will see all the groups that this project is shared with.
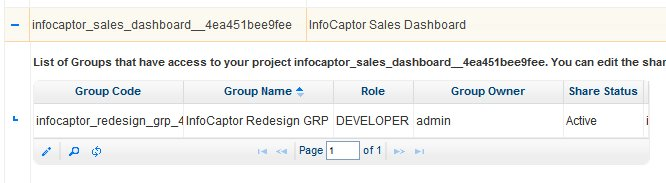
You can the project with as many groups you own or are a member of. You can control the sharing role of all your projects.
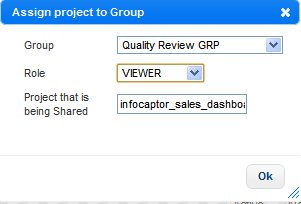
For e.g we create a new group “Quality Review GRP”.
The job of Quality Review team is to have visibility on the project but not able to edit any of the projects/pages.
So we share the project as “VIEWER” rolet to the QA grp
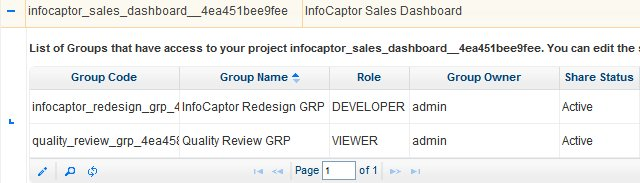
How to see all my share projects
Just below the “MY Projects” listing there is a button
“Show all Groups containing my projects”
Click on that button

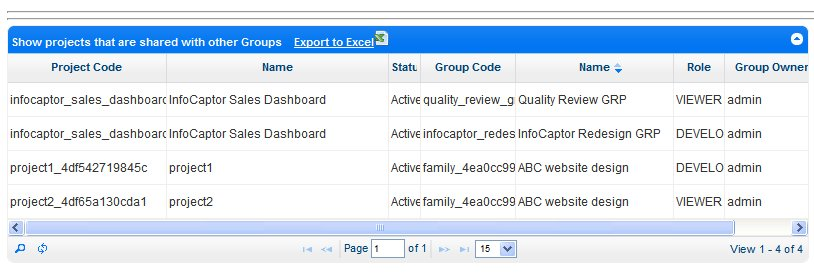
The listing shows all your projects against all the groups that it is shared with.
Now let us see how Page sharing works
Page Details
Each individual Page can be shared with directly to any user but the best practice recommendation is to share the project (containing the page) to a group and use direct sharing only when absolute necessary.
The other option is to make a page Public. You can also make the whole project public. When you make a project public, then all its current pages and any new mockup/page you add to the project will be publicly visible.
But if you make individual Page public then only that page in the project is publicly visible. Each publicly visible page is “read only”. The URL is not exposed to any outside user.
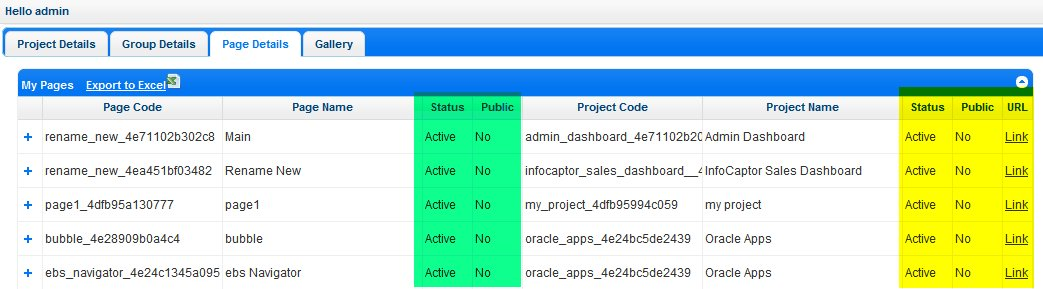
The “Status” can be either ‘Active’,’Disabled’ or ‘Archived’. The green region columns are for the Page and the yellow is for Project.
NOTE: If the page is not public, then the link will show the page only when you are logged in. This was basic introduction to dashboard functions.