
InfoCaptor Enterprise now comes packaged with in-built mini datawarehouse that you can use it to upload flat files and convert them into SQL tables.
Once your flat files are in SQL then you can perform join operations between multiple flat files and perform advanced analytical queries using SQL.
NOTE: InfoCaptor provides the ability to directly connect to Excel files and you can still perform SQL operations using this method
By uploading flat files you are creating a common repository of loosely held data and allows certain degree of standardizing your datasets.
For e.g you can allow the main controller or SME to upload all Flat files into a common account from where everyone else can query and use the data set.
Now that we highlighted few benefits of this new functionality let us see how to upload data
Step1: Prepare your data

Make sure that the Excel or CSV file has the first row as the column names. There should be no special characters in the column names.
All the column names should fit in single row. There should be no merged cells (rows or columns)
The second row after the column names should contain the actual data. There should be no gap between the column names row and the start of actual data.
Step2: Select and copy your data.
Press Ctrl+A to select all the data in the worksheet.
And then press Ctrl+C to copy the data in the clipboard
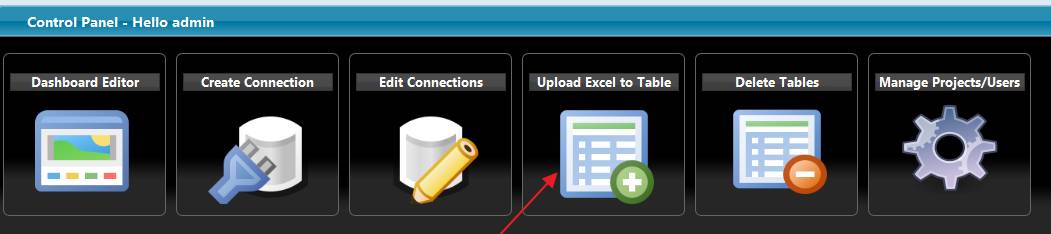
Next, go to the Upload data page
You can do this from the launch pad
OR
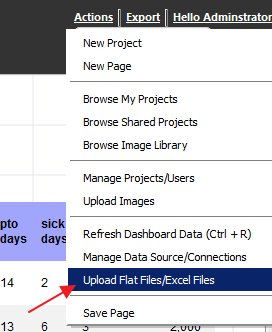
You can do this from the dashboard designer
The upload page looks like this
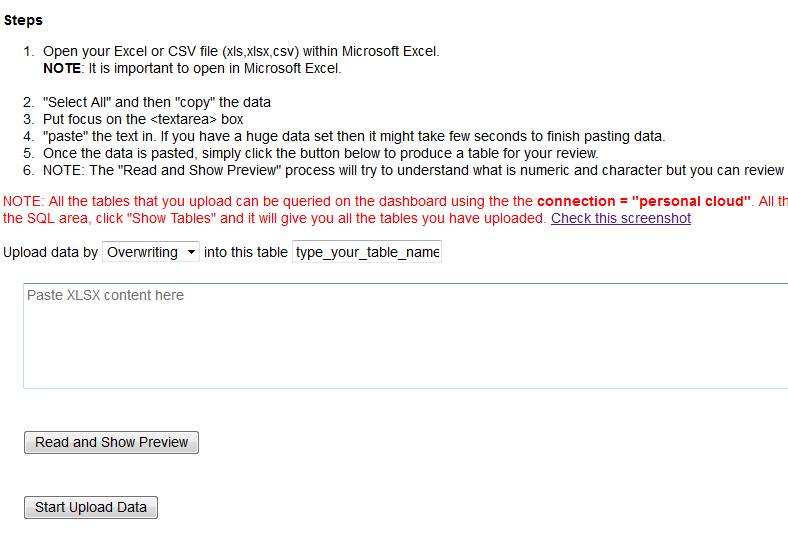
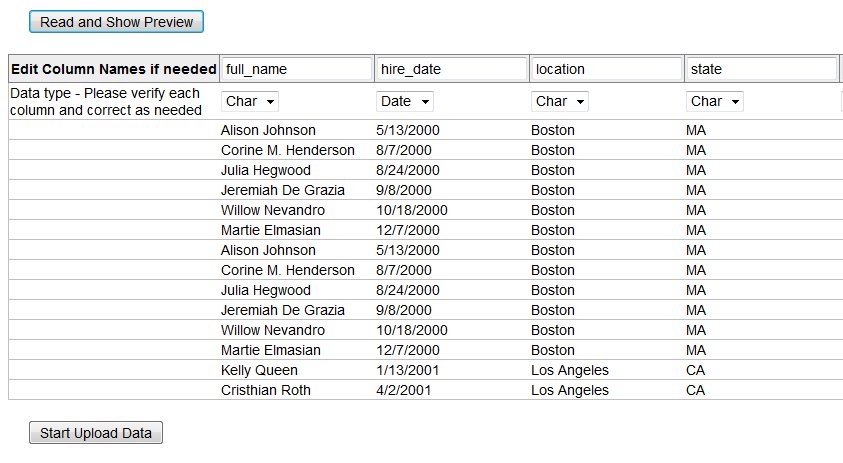
Step 3: Paste the data and review
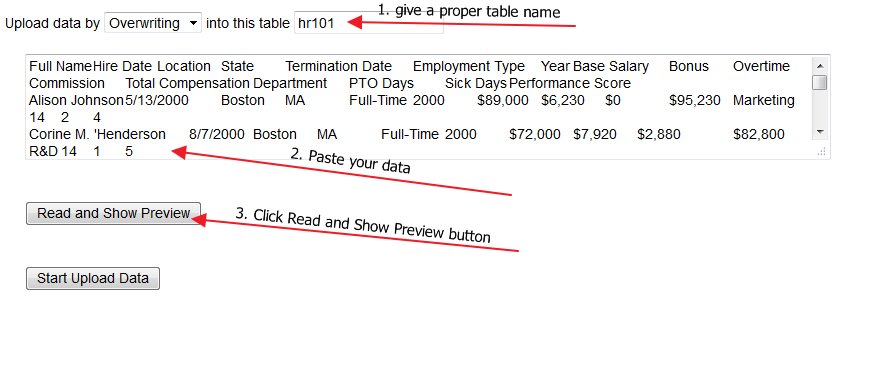
- Give a name to your data table
- Paste your data from clipboard
- Click on the “Read and Show Preview” button
The read and show preview will scan your data and generate a preview of how the data will look when uploaded
Step 4: Review and upload
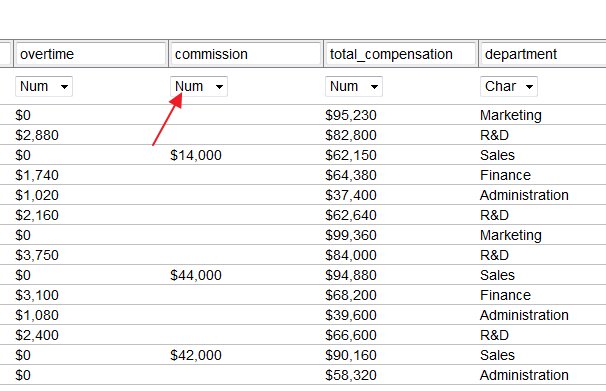
Adjust the column data type as you see fit. When the first row contains blank data then the parser assigns a character data type. In the above case, commission is a number column so we manually change the data type from character to number
Once everything is adjusted, click on “Start Upload Data”
The data will be uploaded in batches of 1000 rows. So if there are less than 1000 rows then it will be done in one load and everything is automatically taken care.
Once the data is loaded you can go back to designer and query the uploaded data via the “personal cloud” connection.
“Personal Cloud” is the default connection to your personal data warehouse and it is only visible to you unless you share the connection with some other user.
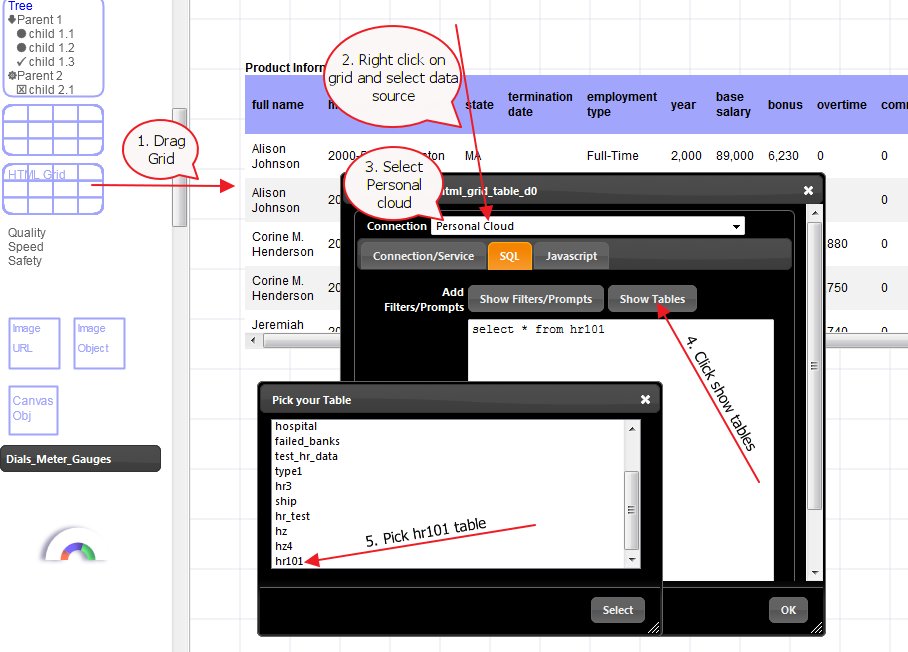
- Drag the HTML Grid into the designer canvas
- Right click and select Data source
- Select ‘Personal Cloud’ from the connection drop down list
- Click on the “Show Tables”
- Pick the recently uploaded table “hr101”
- Click “Select” button
- A SQL query is generated and pasted in the SQL region
- Click OK and it fetches and display the data in the grid
This completes the basic introduction to uploading data.
You can watch the video below to see it in action
Infocaptor – Upload flat files into datawarehouse – personal cloud